Elephant of the Day

 
Pink polka dots with bright floral riding blanket. Yellow hand stitched ears. Super girly!


Six Months

 
You're half a year old already! There have been some fun new developments this month. You both found your feet! You play with them all the time, including when Mommy is trying to change your diaper. We also started giving you solid foods! The first thing you had was some of Mommy's pancakes but I also gave you some yummy avocado! Sophia, you talk and squeal all the time now! I love to see you learn. You softly touch Mommy and Daddy's faces to see what we feel like. You can both push yourselves up onto your hand when you are on your tummies but we haven't seen you try to crawl yet! We are so excited to see what happens in this next six months!

I also captured this:


Elephant of the Day

 
Yellow polka dots with pink blanket stitched ears. It has a floral riding blanket stitched on its back!


Our First Avocado!

 
Technically this isn't their first solid food. At 2 months old they had a taste of our soft-serve ice cream and a week before this we gave them a piece of our pancakes to chew on. This time we prepared ahead of time.


I bought a few avocados that were rather firm and let them ripen on the counter for a few days. Since we are trying Baby Led Weaning there was no need to mash it; the girls did a fine job mashing it in the little fingers! They really liked it! They ate most of the big slice I gave them. One thing I was not prepared for was the mess and how extensive it would be. But just look at those beautiful messy faces!

Elephant Madness

 
Sanity is something that I feel like rarely happens to me. When I think about peace and quite, I picture the girls napping while I sew cute things and watch Mad Men. Thankfully my dreams have come true! I feel like to keep the sanity I need to definitely be creative. I mean, I got a degree and all I might as well use it!
 
I started making these adorable elephants for my friends kids birthdays. More out of a lack of money and my desire to be crafty! Everyone loves them. I am a women who like immediate satisfaction. Sure, I would love to hand bead gorgeous wedding gowns. Do I have the patience? no. These little cuties are my answer. Now here is my master scheme.
 
On September 22nd, 2013 there is a giant craft fair at a church nearby. This single fair attracts thousands of people. I don't expect to a millionaire at the end of the fair but my goal is somewhat more attainable. I'm not doing this for the money, although it would be nice. It is a goal that is important for me to accomplish. Without goals I'm lost and it's been so long since I've had one. My goal is just to make it there with enough stuffed elephants to fill my table. I have 10 made right now and I think I will reveal one at a time each day.


A long day

Today we got up at 7 am to feed the girls, which never happens. Well as Tristan tried to go back to sleep I decided I wanted to go garage sailing! With a little pushing we made it out the door to drop the girls off at my parents. We drove all around town with little luck. Soon we found a sale where everything was free! We got 3 board games to start our collection. The last stop we paid $5 for 3 books, 2 beautiful ceramic planters, and a little Asian god statue for my mantel. The girls were sleeping by the time we got back and after Tristan curled up with Lilly, I snapped this picture. So beautiful!

Chewbeads


This has to be one of the best ideas ever. These are Chewbeads. Necklaces for Mommy that are baby safe! I haven't been able to wear nice necklaces in awhile due to the constant tugging and chewing. These are made of 100% silicone! They come in super adorable colors and styles. They have bracelets as well! This is the Jane Necklace in Turquoise.


A play day

 
 Great Grandma Maggie made the girls these beautiful quilts! I was afraid to use them because they are so nice but they make great play mats for the girls!
 

hopefully soon that silly bald spot will grow in

DIY Diaper Sprayer


We have been cloth diapering the girls for 5 months now. We FINALLY decided it was time for a diaper sprayer. You discover this when 2 days worth of poopy diapers sit in the bathroom and you have no drive at all to swish them in the toilet. So off we went to Lowes! You can buy kits online but they cost $40ish dollars. This is how we made one for $20. We started with this video but we found a way to cut out 2 parts. It took us less than an hour to set it up. This is our DIY:
 
PARTS:
1. Toilet connector hose (you can cut the one you already have but we live in an apartment and didn't want to cut that one)
2. 3/8" ball valve
3. 3/8"x 3/8"x 3/8" T-connector
4. 5 #4 metal clamps
5. Kitchen spray (if you can find a kit that includes the hose you can skip part #6, our Lowes didn't have one)
6. Kitchen spray hose
 
TOOLS:
1. Plumbing tape (we didn't end up using it)
2. Saw
3. Wrench
4. Screwdriver (our clamps required a flathead)

INSTRUCTIONS:
 
STEP 1:
1. Turn OFF the water supply, place bowl under toilet
2. Flush the toilet a few times to drain the tank
3. Remove the tubing (above)

 Any extra water is go into the bowl. It will look like this.

STEP 2:

1. Saw the hose you just removed (or the one you bought) in half
2. Slide a clamp onto each end
3. Insert the straight side of the T-connector into each side (I would have made it match up better instead of being all twisty)
4. Use screwdriver to tighten the clamps as much as you can

STEP 3:
1. Cut the bolt end off of the sprayer hose leaving as much hose as possible
2. Cut again a few inches up the hose (this is where we will connect to ball valve)

STEP 4:
1. Slide the clamps onto the open ends
2. Insert ball valve into each end
3. Tighten the clamps as much as you can

STEP5:
1. Slide last clamp onto open end
2. Insert into T-valve
3. Tighten clamp
4. Put toilet hose back on tightly
 
STEP 6:
1. Make sure the ball valve is in the OFF position
2. Leaving bowl under toilet, turn water back on slowly
3. Flush a few times and check for leaks, tank should fill back up
 
TESTING:
1.Turn ball valve to ON position
2. Holding sprayer over toilet, squeeze trigger and check for leaks
3. When you are done spraying the diaper turn valve to OFF position and squeeze trigger a few times over toilet to get rid of remaining water in hose
4. DONE!

Forth of July


The girls had a great time on their first 4th of July! We went to Independence fest and walked around with fresh squeezed lemonade and looked at all the craft booths. Every-other person stopped us to ask about the twins. They draw so much attention! We went back to where our blanket and chairs were set out in the big field and visited while we listened to Rick Springfield sing at the stage nearby. When it got dark they set off the fireworks and the girls loved them! Leaving the parking lot was crazy and the girls were so fussy that Tristan and I had to shake their car seats till our arms gave out! It was a great time with friends and family!

Cloth Diapering 101

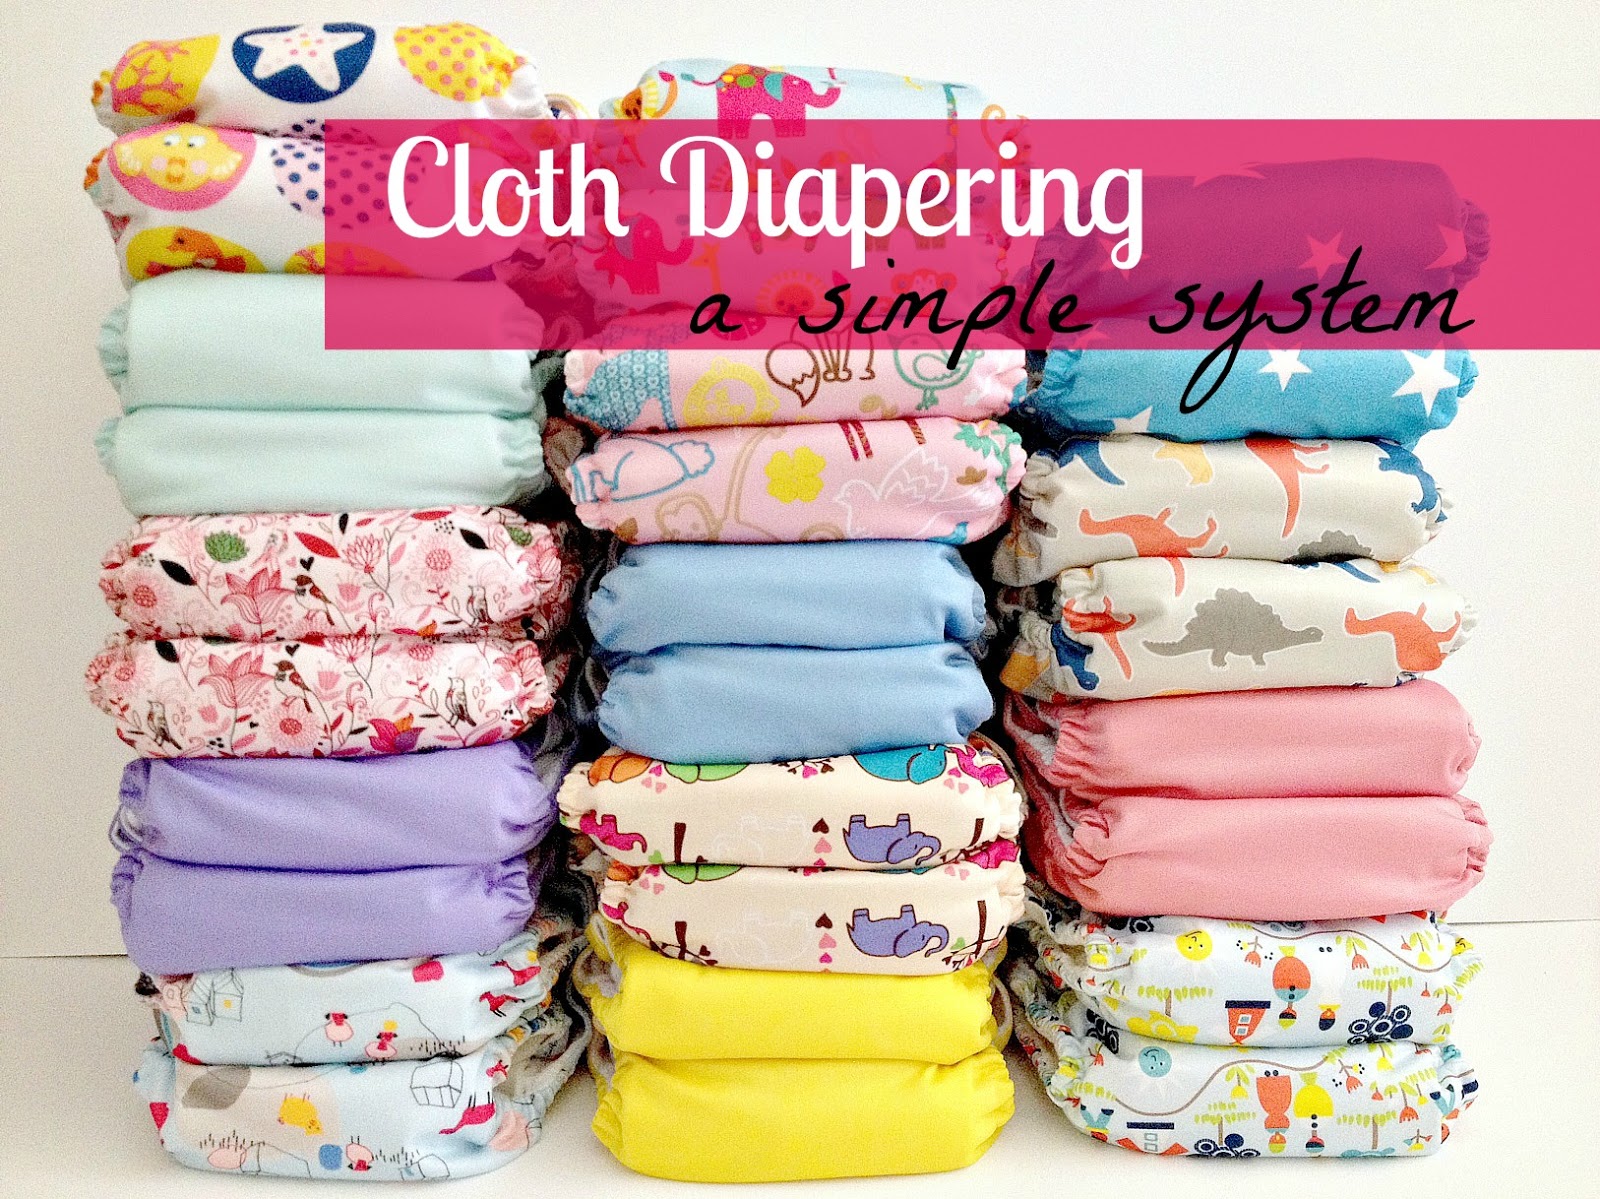
I wanted to share my own cloth diaper routine. For most cloth diaper users it is a process of trial and error. I wanted to share what I use and the things I have learned in order to help you better choose your own routine. Let's get started!


We use Alva diapers (other brands will be listed at end of page). They are pocket style diapers and they go on similar to disposables which makes them convenient to use.
 

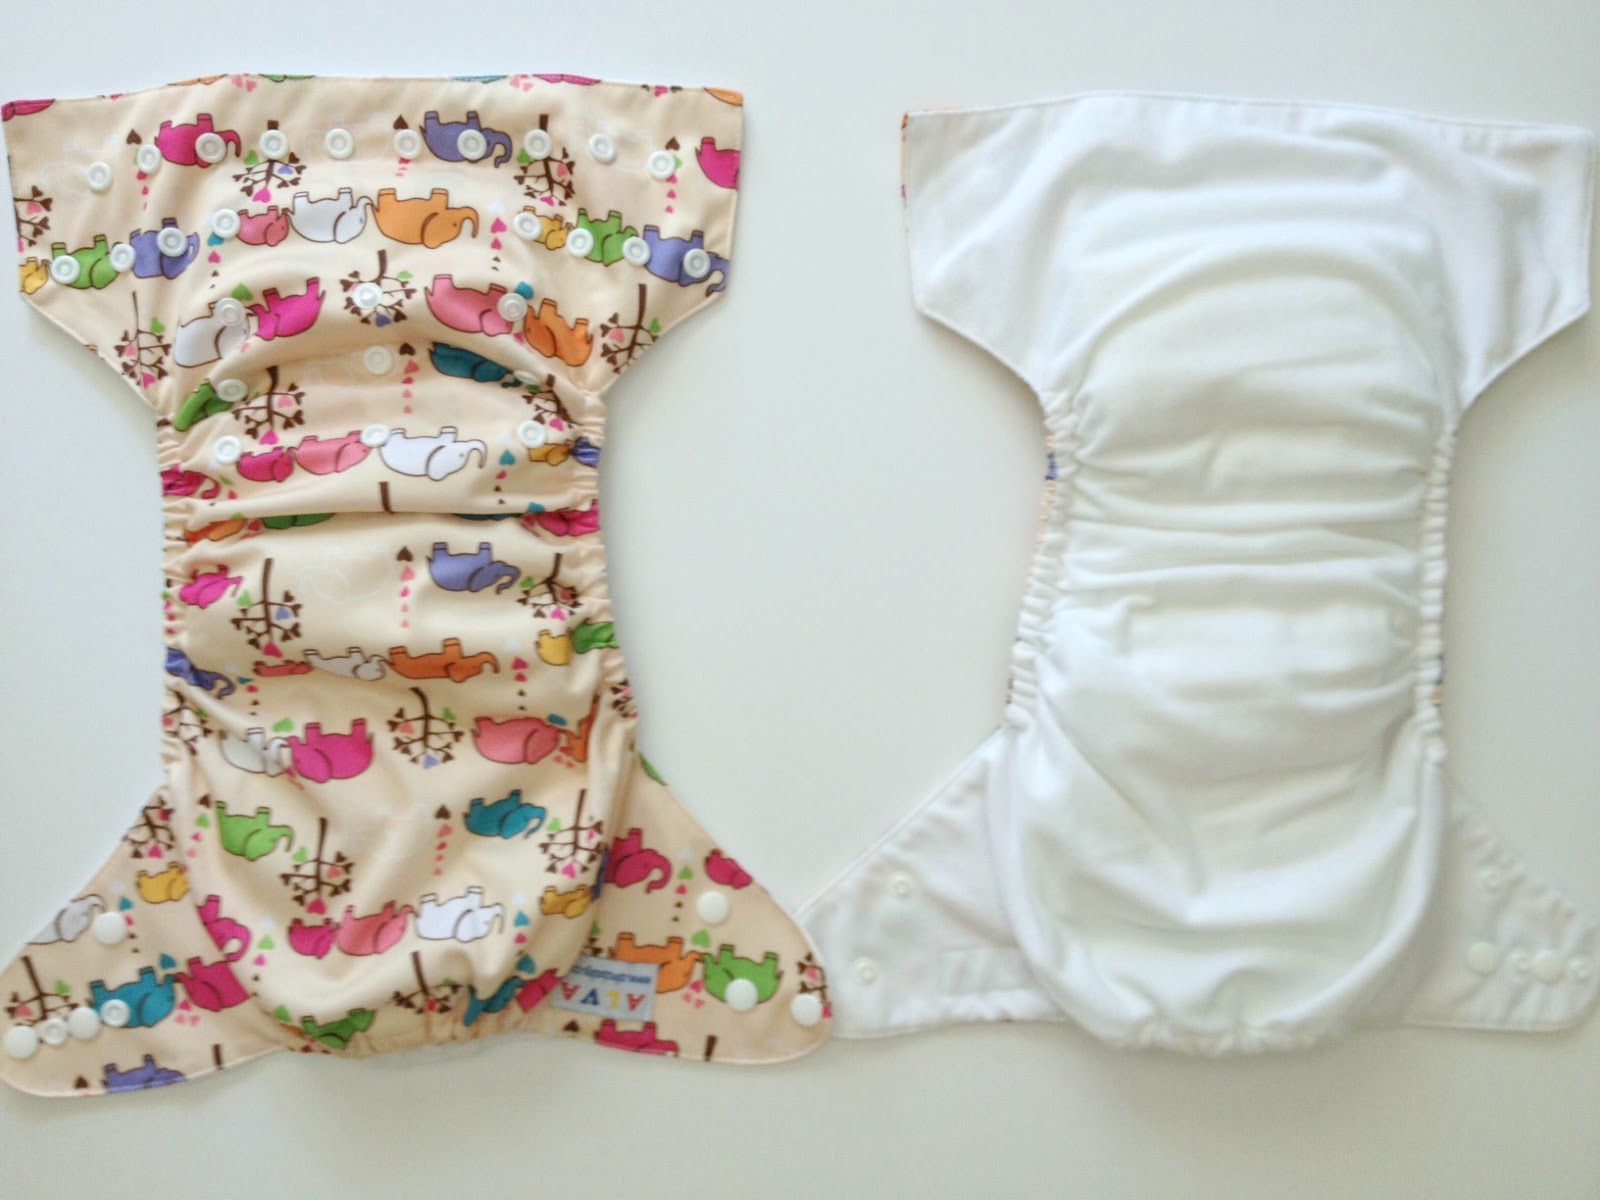
We are going to use this adorable elephant print as our example.
 
 
Shown is the front and inside of the diaper. This outside is waterproof and the inside is soft polyester. It is stay-dry meaning when your child pees he/she doesn't feel wet.
 
 
 For our girls (6 months old) we use the shortest rise setting. It really depends how short or long waisted your child is.
 
 
This is the insert pocket. When my laundry is clean I sit down and stuff all my diapers. It takes a little bit of time, and some people hate doing it but I really don't mind. Its relaxing!
 
 
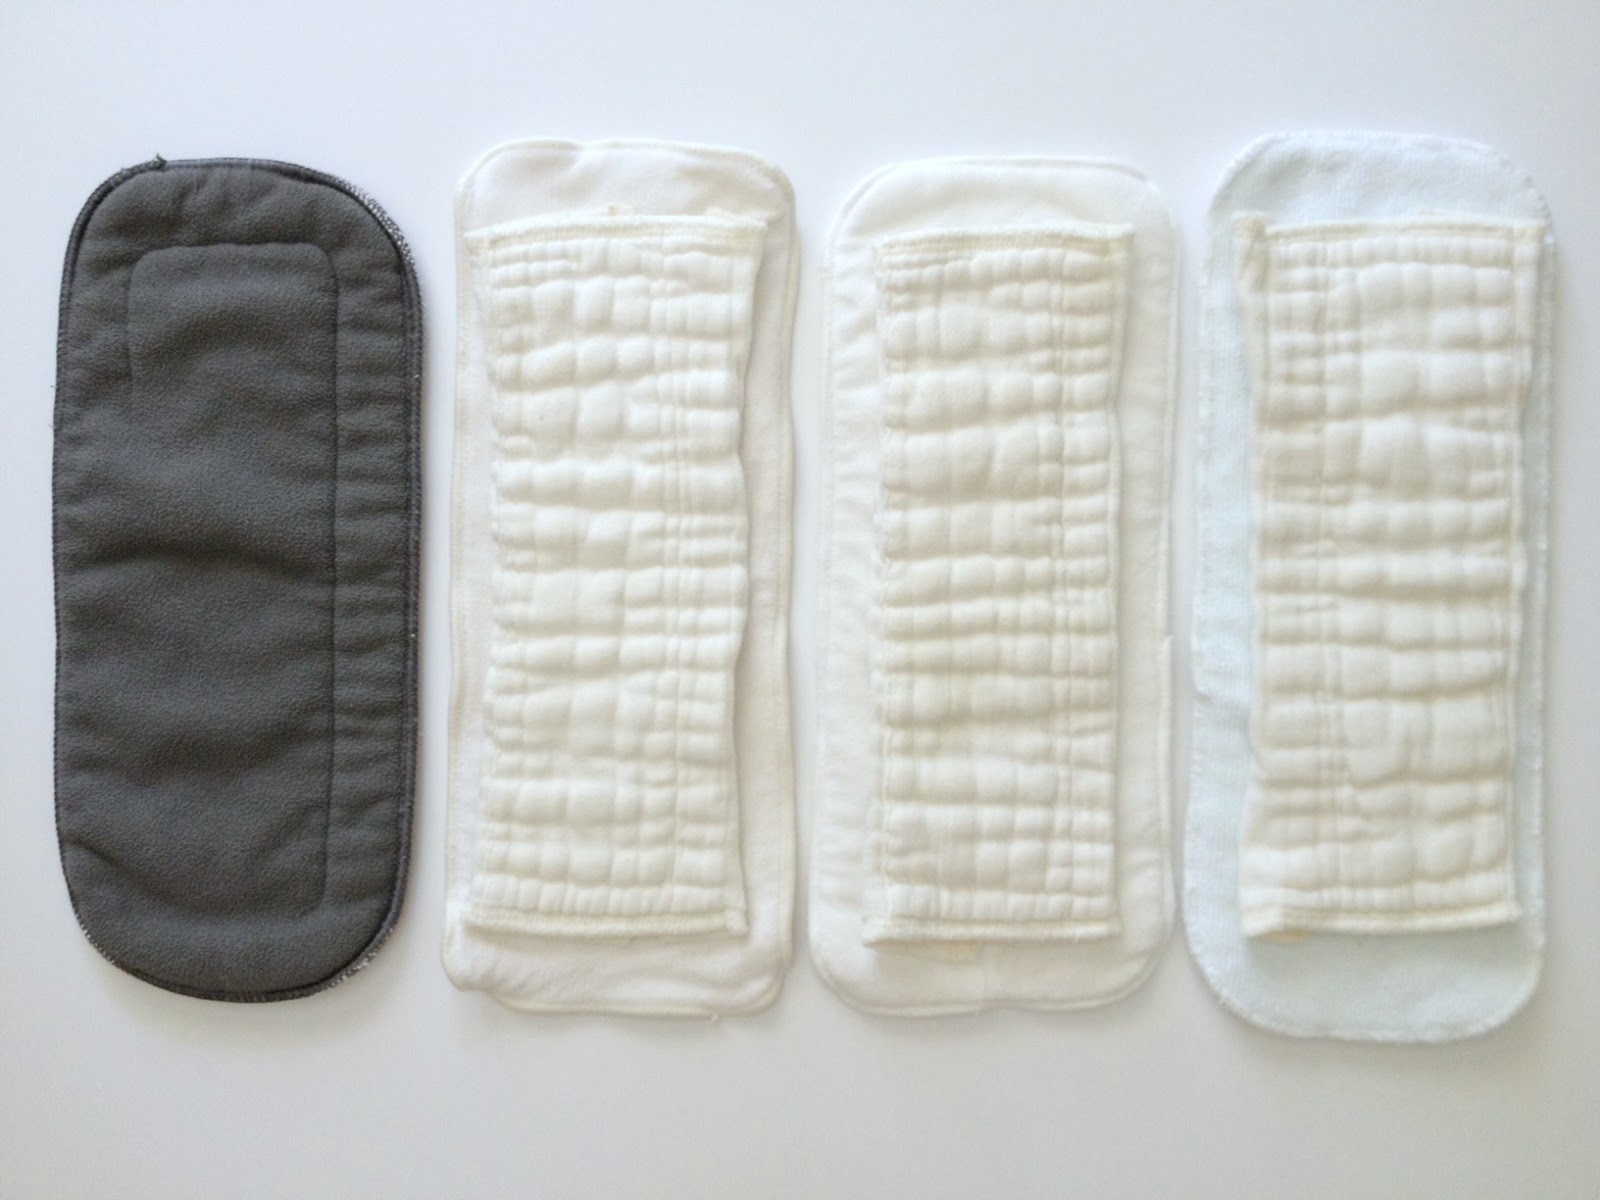
Now there are a ton of different options, fibers, and brands you can use. I personally am really cheap so almost all of the inserts I have I either bought used or people gave me. So my assortment is rather random. Here are the ones I use:
 
1. Babyland (CBI) Charcoal Bamboo Insert- 2 layers bamboo, 3 layers microfiber.
Pros: super absorbant, anti-bacterial, and trim. Cons: microfiber tends to have compression leaks.
 
2. Baby Wizard 4-layer bamboo insert with a (preemie) cotton prefold. Bamboo is more absorbent than cotton but one of these alone can not stand up to my heavy wetters. The prefold on top gives just a little bit more absorbency. Can feel thick on little babies.
 
3. Alva bamboo blend insert with a (preemie) cotton prefold. This, like the babyland, is a blend. It has 2 layers of bamboo and 2 layers of microfiber. Again it's not enough for my girls so I use a prefold.
 
4. Assunta microfiber insert with a (preemie) cotton prefold. No bamboo here. These are 3 layers of microfiber. I pair with a prefold. NOTE: do not place microfiber directly against the skin, it is so stay-dry that it will irritation.
 
Please check this website out for great info on insert choices, she answers basically everything!
 
 
Time to put the diaper on!


 You will want to check the fit to make sure it's good. One finger should slide into the waist, like above. This means it comfortable and not too tight.
 

This is where the hip snaps come into play. One finger will be kind of hard to fit into the leg hole. You want it tight enough so nothing leaks out but loose enough that your baby isn't uncomfortable and can move.
 
NIGHTTIME OPTIONS:
At night my girls sleep 12 hours. That's a lot of pee to hold in one diaper. But with a LOT of trial and mostly error we found out what is best for us.
 

This is called a "fitted" diaper. It looks like a regular diaper like above but nothing is waterproof, the whole thing is made of bamboo velour. This brand is Assunta. The elastic is really nice and it seems really comfortable. The best part is... it's CHEAP! It is $12.99 compared to most fitteds which run around $30. This requires you use a cover over it. Assunta sells them for cheap. When in doubt you can use an unstuffed pocket as well.
 

This is the inside. It has one sewn in layer of bamboo and one snap in layer of bamboo. You can remove or add the snap in layer to suit your needs. It also has cross-over snaps for tiny babies. This wont go all the way to potty training as it runs small but my girls are 6 months and are still on the smallest rise. I only have 4 of these so if necessary I will use disposables at night (yes I said disposables!).
 

This may look weird but bear with me for a moment. I do NOT want to clean poo out of this beautiful diaper. Therefore I made my own mirco-fleece liners. I got the fabric from Jo-ann's and cut out rectangles. Liquid passes through and poo stays on it (can be used for the pocket diapers too). Now I will discuss cleaning poo from diapers (I know what your thinking...)
 
If your child pood, there are a few ways to clean it up. First, if you used flushable liners, just throw it away. If you used a reusable liner (like above) you can swish it in the toilet and flush. If you don't have a liner I would recommend a diaper sprayer. Its like a small shower head that removes the poo directly into the toilet. We just made one and you can find the DIY here. Remove all the poo that you can (residue is okay), pull out the insert and throw all of it in the pail!
 

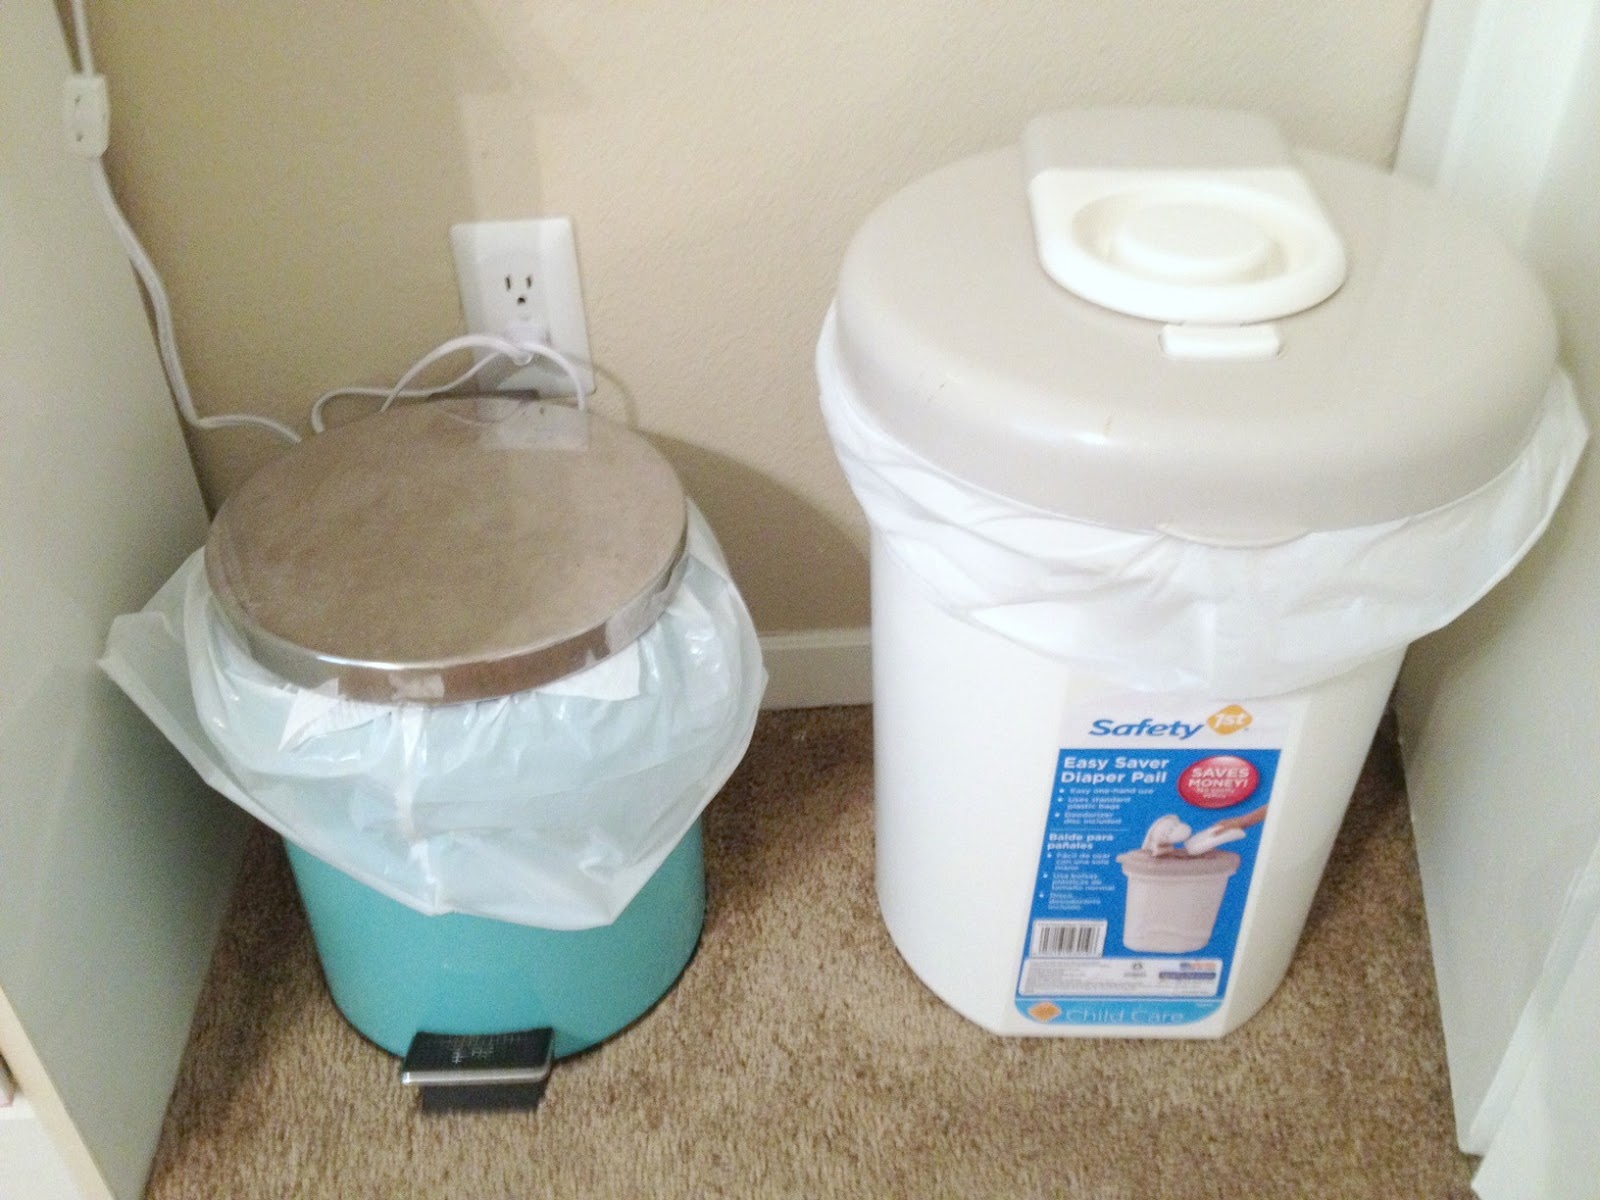
When I remove a diaper from my baby I pull out the insert (they say it will come out in agitation but im not risking having to re-wash). Drop them both in the diaper pail. This is a DRY pail. I use an 8-gallon garbage bag but they make re-suable ones. Pictured is also my little garbage can for wipes, etc.
 
Time to wash!
 

Every third day I wash my diapers. Here is my routine:
 
1. COLD rinse only
2. HOT wash and cold rinse (using 1/4 to 1/2 detergent for load size)
3. COLD rinse
 
I use Ecos detergent (pictured). It is not specifically for cloth diaper but I find it works great. Click here for a GREAT chart to help you choose the best detergent.
 
When everything is washed I throw it all in the drier and dry on high. I remove the diapers (leaving the inserts) part way through and let them air dry the rest of the way. There are people for dry on high all the way and people who only hang dry as well. Check the inserts after the cycle to see if they are dry. Some things like the fitteds need a little longer.
 
TIPS:
1. I have found that onesies create compression around the leg holes and therefore leaks. I removed onesies from the equation and no leaks!
 
2. Do NOT use fabric softener in either the wash or dry stages. It will cause the lining to repel liquid instead of absorb it.
 
3. Do NOT use diaper rash cream. It will cause repelling as well. There are other options for diaper rash out there. Some switch to disposables till it is gone as well. We have never had rash in cloth.
 
4. There is difference between boys and girls (shocked?) When girls pee it tends to go to the back, especially if they are really little and always on their back. For boys you need to point his "boy parts" down so you don't have a giant mess to clean up.
 
5. Google cloth diaper co-ops. These are groups of people who place one large order but you get your diaper for SUPER cheap. They are all through facebook.
 
HELPFUL LINKS:
Diaper brands (each brand also has inserts):
JCtrade- these are great as they run larger
There are many others...
 
Great resources:

A BIG thank you to my beautiful model Sophia!
 
Like what you see? Please vote for my blog by clicking below :)
Click To Vote For Us @ the Top Baby Blogs Directory! The most popular baby blogs